Sinbad on training wheels! That's what Barry Lancuski called this picture he shot. Barry was part of the "Motley Crew" that help launch Sinbad and take her up to East Tawas from Bay City, Michigan in the last week of June. The Motley Crew are three friends that were born with fishing poles in their hands and who were truly surprised that they didn't break out with a rash when they stepped on board a sailboat. Pictured above is crew member Greg Coulter with me in Sinbad.
The rest of the crew........Larry Mitchel and Barry.
When Sinbad splashed into the water I scrambled below to make sure no water was coming in. Thankfully there wasn't. When the boat was on the hard I repacked the rudder post, replaced the raw water hoses on the engine and drilled a couple of holes and mounted a new dyna plate below the water line for the SSB (some day we will buy one). All were spots for water to enter the boat if I screwed up.
The engine fired right up and again I hustled below to make sure nothing was leaking. No leaks.....cool! Not only had I replaced the raw water lines, I had replaced the transmission heat exchanger, all the engine coolant hoses and rebuilt the coolant heat exchanger. Life was good!
Time to head down the river toward Saginaw Bay.
Not a lot of wind that day- we sailed along at 4 to 6 mph. You can see that the crew had no trouble getting comfortable. I did hear a occasional " Where are the rod holders? We need a line in the water! "
Then came the rain. During the last hour or so we got a little wet. All in all it was a good day to be out on the water. Thanks to the Crew we made East Tawas State Dock safe and sound!
Happy Sails..........rr
Tuesday, July 12, 2011
Monday, July 11, 2011
"Oh, my Limoges!"
In "Out of Africa", Karen Bliksen cried out when her crate of delicate fine china fell and smashed to bits on the road to her new life as a coffee planter in Kenya. However, it was the last time that china counted for much in the landscape of her life....
Randy and I are going totally bonkers with stressful multitasking at the moment. I am still employed, with only 18 days to go! Randy's working five days a week on several major jobs on Sinbad. We are within 2-3 weeks of completing liquidating our households: both of us are renting and selling our homes, giving away truckloads of clothing and furnishings, getting rid of our cars, and making all sorts of arrangements to manage our financial affairs via the internet. This is a fairly clinical description. It is really more of a massive farewell to our lives as we've known them until now. We are saying farewell to friends and family, some of whom may come to visit us in faraway places, others who surely will not. We are passing along all the things we've collected over a lifetime; keepsakes and souvenirs, pictures of our school days and those of our children and parents, favorite dresses and fancy shoes, Randy's guns and bow and deer hunting gear, our skis. Realizing that we won't be skiing again, or sitting quietly in the woods with the snow falling,waiting for deer to silently appear, or contentedly planting in the garden. Both of us have had pangs of regret for these things passing from our lives. But we've decided to trade "things" for "experiences". We are working with determination to finish our refit, to modernize Sinbad into the well founded cruising vessel and comfortable home from which we will see the world. We think of ocean passages, with days following nights of disciplined watchkeeping, watching the Milky Way float through the velvet night sky for hours until dawn fades it to pale lilac. The solitude broken suddenly by the gasping breath and the shining eye of a dolphin swimming just below my elbow. The first sighting of a Bermuda Longtail, harbinger of landfall. The carnival feeling of arriving in a foreign port, with the smells of hot earth and spicy greenery fresh in our nostrils. The cheerful camaraderie of other sailors, (especially other Whitby folk!).
Soon enough we will be older and living again on land. But for now, "we do it for the stories we can tell" !
Cheers, Di
Randy and I are going totally bonkers with stressful multitasking at the moment. I am still employed, with only 18 days to go! Randy's working five days a week on several major jobs on Sinbad. We are within 2-3 weeks of completing liquidating our households: both of us are renting and selling our homes, giving away truckloads of clothing and furnishings, getting rid of our cars, and making all sorts of arrangements to manage our financial affairs via the internet. This is a fairly clinical description. It is really more of a massive farewell to our lives as we've known them until now. We are saying farewell to friends and family, some of whom may come to visit us in faraway places, others who surely will not. We are passing along all the things we've collected over a lifetime; keepsakes and souvenirs, pictures of our school days and those of our children and parents, favorite dresses and fancy shoes, Randy's guns and bow and deer hunting gear, our skis. Realizing that we won't be skiing again, or sitting quietly in the woods with the snow falling,waiting for deer to silently appear, or contentedly planting in the garden. Both of us have had pangs of regret for these things passing from our lives. But we've decided to trade "things" for "experiences". We are working with determination to finish our refit, to modernize Sinbad into the well founded cruising vessel and comfortable home from which we will see the world. We think of ocean passages, with days following nights of disciplined watchkeeping, watching the Milky Way float through the velvet night sky for hours until dawn fades it to pale lilac. The solitude broken suddenly by the gasping breath and the shining eye of a dolphin swimming just below my elbow. The first sighting of a Bermuda Longtail, harbinger of landfall. The carnival feeling of arriving in a foreign port, with the smells of hot earth and spicy greenery fresh in our nostrils. The cheerful camaraderie of other sailors, (especially other Whitby folk!).
Soon enough we will be older and living again on land. But for now, "we do it for the stories we can tell" !
Cheers, Di
Tuesday, June 14, 2011
The Raw Water Pump
In this picture the raw water pump is the hunk of brass with the dirty hoses connected to it. It's the pump that takes the water from outside the boat and pushes it through the three heat exchangers on the engine. I never checked this pump (with its replaceable impeller) when we bought Sinbad. I had a lot on my plate and what the heck, let sleeping dogs lie, there was a good flow of water coming out the back of the boat. The time came for me to check it out- not easy. The cover plate to the impeller is on the left with tiny screws and the oil line from the heat exchanger blocks the way for using a screw driver! The newer model pumps are turned 90 degrees so they face outward and are easy to get to. For just $600 bucks (that is 0.60 boat dollars) I could make life easier for me in the future.......not going to happen.
(Boy digital cameras are nice! They beat a mirror when it comes to seeing what you are doing!)
Here's the old impeller (black) inside the pump after I got those (pain in the butt) screws out.
So I'm looking at the picture of the impeller thinking that I've seen worse.....maybe put the cover back on? Well the "lazy me" lost that argument and I pulled the impeller. Glad I did- I found that part of a blade was missing. I figured the missing part would be in the heat exchanger and I was right. Easy job, the heat exchanger is in the top left center of the first picture.
In this picture the new impeller is on the left and the old is on the right with the piece out of the heat exchanger in front of it. So I put it all back together and quit for the day!
Happy Sails...............rr
Here's the old impeller (black) inside the pump after I got those (pain in the butt) screws out.
So I'm looking at the picture of the impeller thinking that I've seen worse.....maybe put the cover back on? Well the "lazy me" lost that argument and I pulled the impeller. Glad I did- I found that part of a blade was missing. I figured the missing part would be in the heat exchanger and I was right. Easy job, the heat exchanger is in the top left center of the first picture.
In this picture the new impeller is on the left and the old is on the right with the piece out of the heat exchanger in front of it. So I put it all back together and quit for the day!
Happy Sails...............rr
Monday, June 13, 2011
The Boat Fairy Came!
Here is the "Boat Fairy", dressed in the coverall which the guys at Solberg's boatyard in Manistee nicknamed my "prom dress". Sailors in the boatyard do find it downright sexy, especially when it goes with doing a big messy job!
Sunday I completed painting Sinbad's bottom in preparation for the sailing in the salt waters of the ocean and the Caribbean . To use the Petit "Trinidad " I originally wanted would have required the remains of the old bottom coat to be stripped or soda-blasted off right down to the bare hull. So I chose instead the West Marine PCA Gold ablative paint (which is creamy and really nice to work with). I hand-sanded the entire bottom, then applied four coats of PCA Gold with extra coats around the waterline and on the cutwater. I did the last two coats in one day, since the weather was perfect and the season for swarms of fish flies and blizzards of cottonwood is just about to start. We will touch up the areas covered by the jackstands when the boat is in the slings just before launching. I hope it lasts a good long time. Hopefully the next bottom job will be IN Trinidad!
Here's a picture of Sinbad, with her bottom looking like a sapphire!
The Heat Exchanger
Good luck or bad luck - that's the question that I keep asking myself as I continue to find things that are screwed up on Sinbad. It's bad luck that I keep finding things but.........it's good luck that I'm finding them now and not on a passage a few hundred miles from land.
When we put Sinbad to bed on the hard last fall it had a nice dry bilge. This spring I found just a little engine coolant under our 80 horse Ford Lehman engine. I found the guilty hose right away but continued to inspect the entire system. That's when I discovered that a weld on one of the heat exchangers (think radiator) mounting bracket was broken. Not a fun job getting the two pieces off the boat to have them welded up. These surprise "jobs" quit being fun along time ago.
This is a picture of the heat exchanger with the bracket welded back on. For the folks that don't know how a heat exchanger works, water from the outside of the boat is pumped through tubes within the exchanger and motor coolant is pumped through the exchanger outside of the tubes. This prevents your engine from overheating. So you would think all that remains to do is to put it back on the engine with new hoses. Wrong... or should I say "surprise". In the process of checking it out I heard a rattle inside it. There should never be a rattle inside of a heat exchanger. So it was time to do what I do best, tear it apart!
If you double click on the first picture it will enlarge, making it easy to see that some of the tubes are plugged. The second picture is after I pulled the end caps and ran a rod through the tubes. The pile of stones in front of the heat exchanger was what was making the rattle sound. It’s all that remains of a 30 yr old zinc pencil. The zinc is supposed to look like the one in the shiny brass base on the left side of the photo. Zincs are installed to protect the engine from electrolysis in salt water; they don't work in fresh water. I just happened to have the new one because it was on my "to do" list before heading into salt water.
In the long run this was "Good Luck". It saved me from trying to figure out why the engine was over heating when we go through theErie Canal .
Happy Sails........rr
When we put Sinbad to bed on the hard last fall it had a nice dry bilge. This spring I found just a little engine coolant under our 80 horse Ford Lehman engine. I found the guilty hose right away but continued to inspect the entire system. That's when I discovered that a weld on one of the heat exchangers (think radiator) mounting bracket was broken. Not a fun job getting the two pieces off the boat to have them welded up. These surprise "jobs" quit being fun along time ago.
This is a picture of the heat exchanger with the bracket welded back on. For the folks that don't know how a heat exchanger works, water from the outside of the boat is pumped through tubes within the exchanger and motor coolant is pumped through the exchanger outside of the tubes. This prevents your engine from overheating. So you would think all that remains to do is to put it back on the engine with new hoses. Wrong... or should I say "surprise". In the process of checking it out I heard a rattle inside it. There should never be a rattle inside of a heat exchanger. So it was time to do what I do best, tear it apart!
In the long run this was "Good Luck". It saved me from trying to figure out why the engine was over heating when we go through the
Happy Sails........rr
Monday, June 6, 2011
The Tigress on the bow of Sinbad! Finally Power!
Nope, the "Tigress" I'm talking about is not the good looking girl pictured here on Sinbad. That's Chrissie, Diane's oldest daughter. I'm talking about the Loffrens Tigress Windlass in front of Chrissie. I just finished wiring it this weekend. It's been a long haul but I finally got it done.
Here is Sinbad's bow last spring. No windlass, which means that you have to pull up that 45lb CQR anchor by hand. Believe me it's not fun when the anchor is packed with mud and weeds. That happened at Beaver Island last summer,and it made this old man feel REALLY old. At the time I had already mounted the windlass and foot pedals to operate it, but didn't have it wired to the batteries. I knew that I would be relocating the batteries and didn't want to waste the money hooking it up. But now we have power. No chain yet, but life is getting better!
A note to the do-it-yourselfers who read this; Loffrens recommends that the Tigress windlass should be supported by a battery of at least 250 amp hrs. I didn't want the extra weight of two batteries in the bow, so I ran the thick 1/0 wire from windlass to the house bank (under the starboard settee amidships). The windlass motor cover barely fit over the 3 wires connected to the motor. When I tried to run the windlass it wouldn't, the breaker would kick off. After hours of troubleshooting, I pulled the cover back off and I could see where the 1/0 wire lugs were shorting out on the cover. So with a 2x4 and a big hammer, just a few swings later the lugs were flat. I put everything back together and it worked perfectly!
Happy Sails...rr
Thursday, June 2, 2011
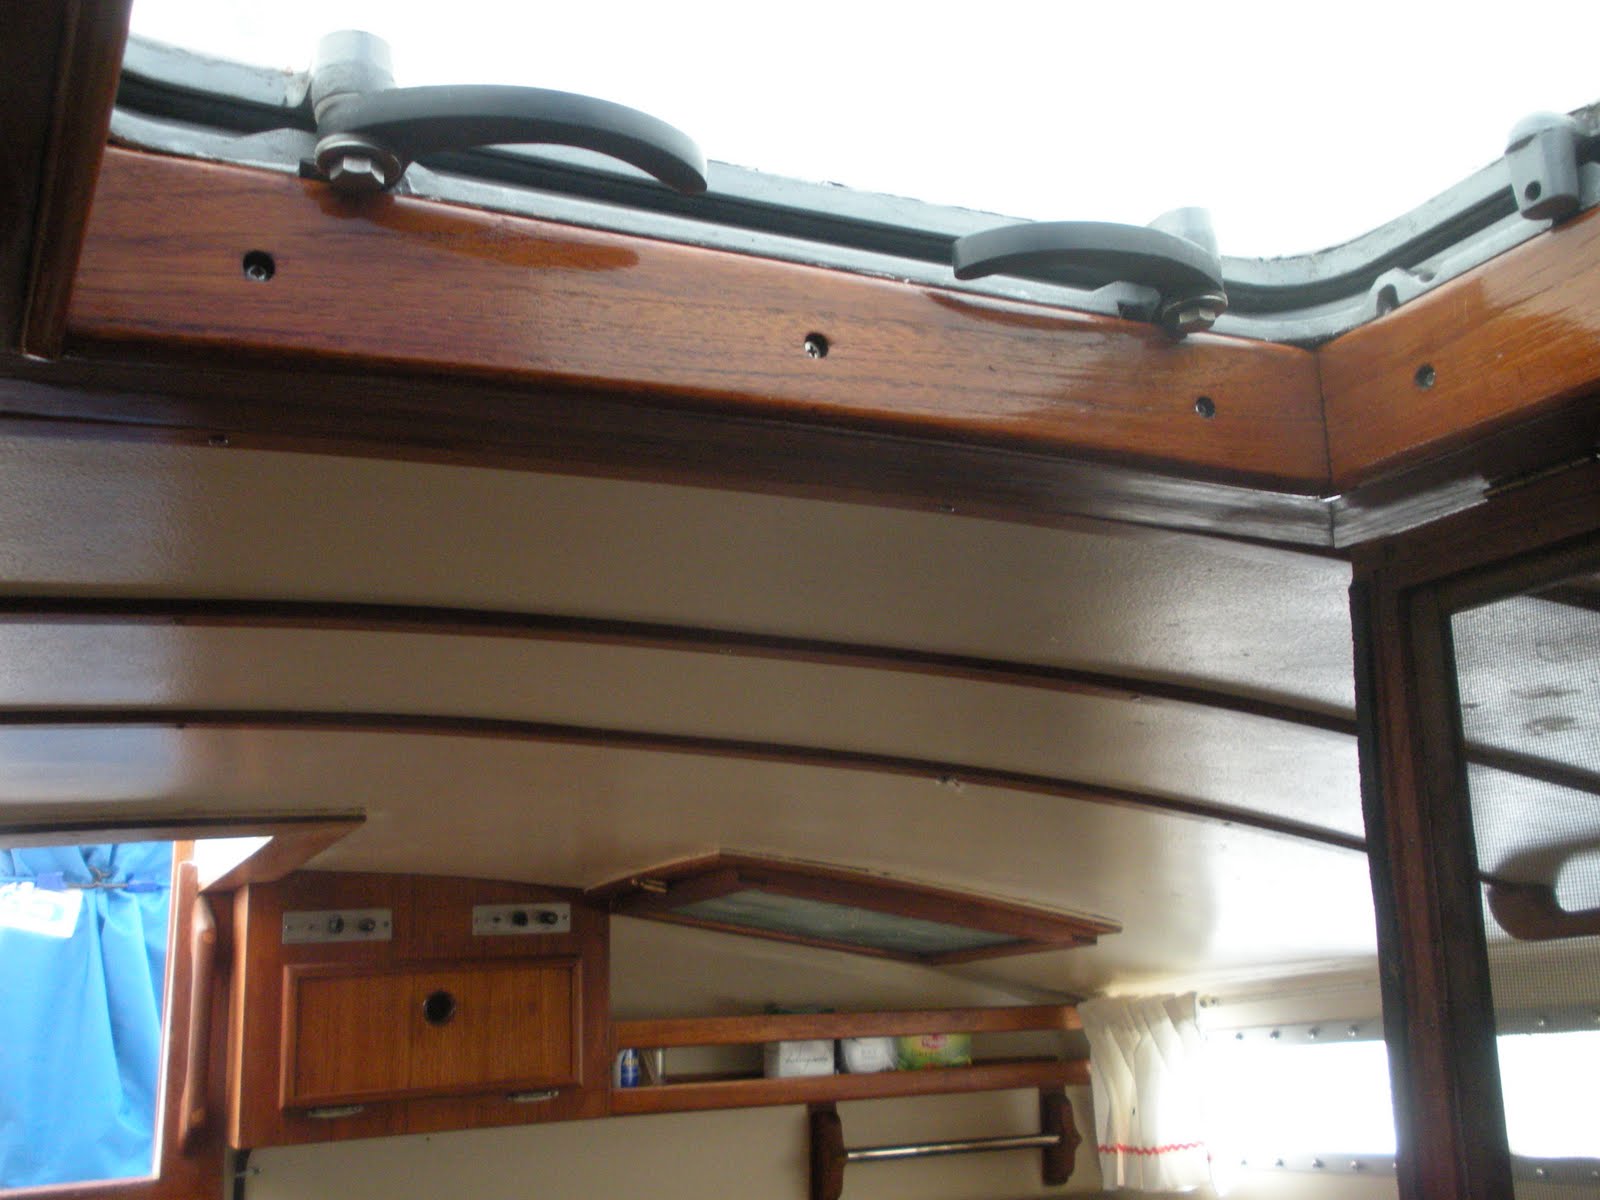
Deck Hatch
There is a problem child in this picture. It's not the good looking girl on the left (Di's daughter Jacque). It's the salon deck hatch (the metal and glass on the right). It leaks, but only when Mother Nature is blowing stink and it's raining sideways. From the inside, I could see daylight under the seal with the hatch closed. It looked like the base of the hatch was bowed down in the center, so I backed the screws out that held the bottom plate down. The bottom plate sprang up and sealed with the top plate.
There was also a chance that the core of the deck is waterlogged and rotten and would need to be replaced. Our moisture meter indicated no problem and I knew that the previous owner had repaired delamination on of the foredeck. I drilled out all the screw holes with an oversized bit. No moisture or rot! Maybe the hatch was carelessly reinstalled after the core repair or the Awlgrip paint job were done. I didn't know the why, I just knew I had to fix it.
The next four pictures are of the opening for the deck hatch with a carpenter square on the four corners.
With all four corners being high I built up the four sides with epoxy to make a nice flat surface for the deck hatch. First I framed the inside of the hole with wood wrapped in Glad ClingWrap with the top part of the wood sticking up out of the hole about 1/2" to create a form to contain the epoxy. Next I built up the outside edge of where the hatch frame would go with clear packing tape. West System epoxy will not stick to the packing tape or the ClingWrap. I filled all the drilled out screw holes with epoxy, then mixed some 405 filler with the epoxy to build up the sides. It took two coats before I could sand it flat.
My next step was to screw the base of the hatch down and put the top part on. It worked, no gaps! So I took it all apart and caulked the base with Life Caulk and put it all back together again.
Diane put a nice finish on the inside trim while it was off. Next she will put the plugs in that cover the screws and another coat of Epiphanes varnish.
Diane will touch up the finish with some white Awlgrip paint and an artists brush. We make a good team, I rip things up and she makes them look good when I'm done! Happy Sails..................rr
There was also a chance that the core of the deck is waterlogged and rotten and would need to be replaced. Our moisture meter indicated no problem and I knew that the previous owner had repaired delamination on of the foredeck. I drilled out all the screw holes with an oversized bit. No moisture or rot! Maybe the hatch was carelessly reinstalled after the core repair or the Awlgrip paint job were done. I didn't know the why, I just knew I had to fix it.
The next four pictures are of the opening for the deck hatch with a carpenter square on the four corners.
With all four corners being high I built up the four sides with epoxy to make a nice flat surface for the deck hatch. First I framed the inside of the hole with wood wrapped in Glad ClingWrap with the top part of the wood sticking up out of the hole about 1/2" to create a form to contain the epoxy. Next I built up the outside edge of where the hatch frame would go with clear packing tape. West System epoxy will not stick to the packing tape or the ClingWrap. I filled all the drilled out screw holes with epoxy, then mixed some 405 filler with the epoxy to build up the sides. It took two coats before I could sand it flat.
My next step was to screw the base of the hatch down and put the top part on. It worked, no gaps! So I took it all apart and caulked the base with Life Caulk and put it all back together again.
Diane put a nice finish on the inside trim while it was off. Next she will put the plugs in that cover the screws and another coat of Epiphanes varnish.
Diane will touch up the finish with some white Awlgrip paint and an artists brush. We make a good team, I rip things up and she makes them look good when I'm done! Happy Sails..................rr
Subscribe to:
Posts (Atom)